Working with round crochet items can be tricky when it changes colors every round and when fastening off.
With How To Crochet Invisible Join When Working with Rounds, we will teach you a trick to make it seamless!
Read on to know this crochet invisible join without cutting trick .
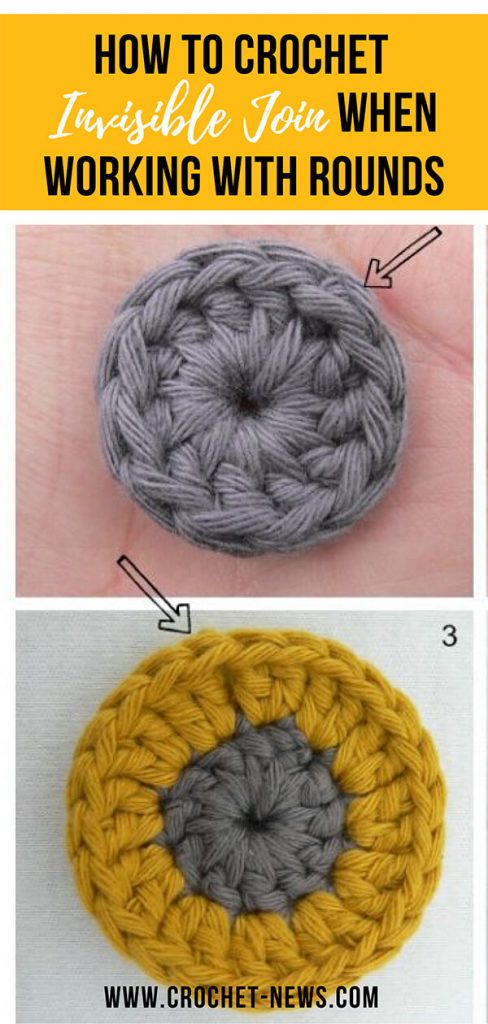
SLIP STITCH JOIN VS. INVISIBLE JOIN
Typically, most crocheters who try to crochet round patterns using ‘slip stitch to join.’ It’s a method crocheters most crocheters learn.
However, the huge difference between the crochet invisible join and the slip stitch join will make you switch your technique!
Slip stitch join is a traditional way of joining two stitches, while crochet invisible join is a “false” or fake stitch which has been used as an alternative to the slip stitch.
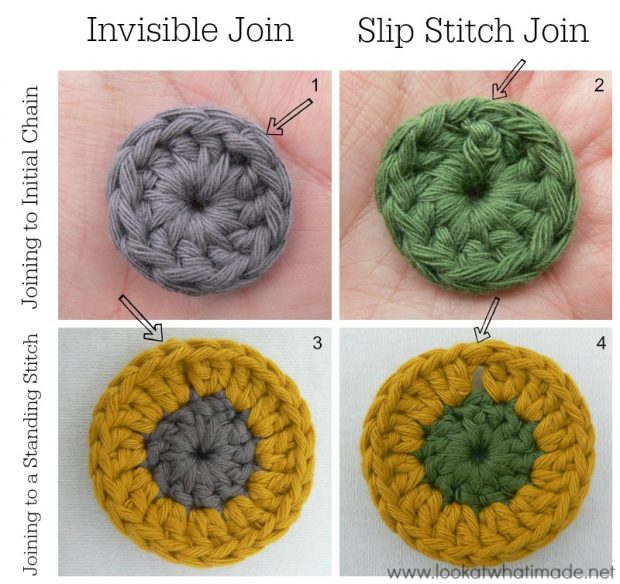
When one uses the slip stitch to join, you can actually see the ‘join’ – it’s the line that extends from the center to the edge even when you crochet a flat circle.
On the other hand, a crochet invisible join removes this. Therefore, a crocheted circle using invisible crochet will appear seamless, cleaner and more polished.
To learn to do the crochet invisible join, try these steps and see its advantage from the traditional slip stitch.
How To Crochet Invisible Join When Working with Rounds
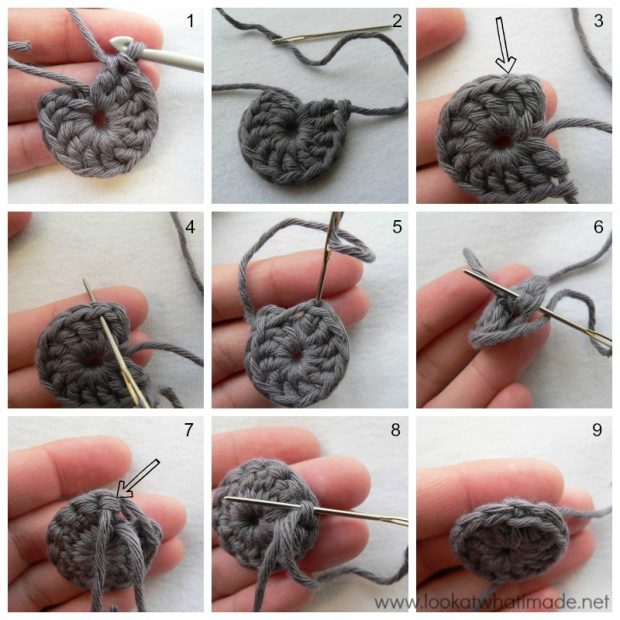
CROCHET INVISIBLE JOIN WITHIN A STARTING CHAIN
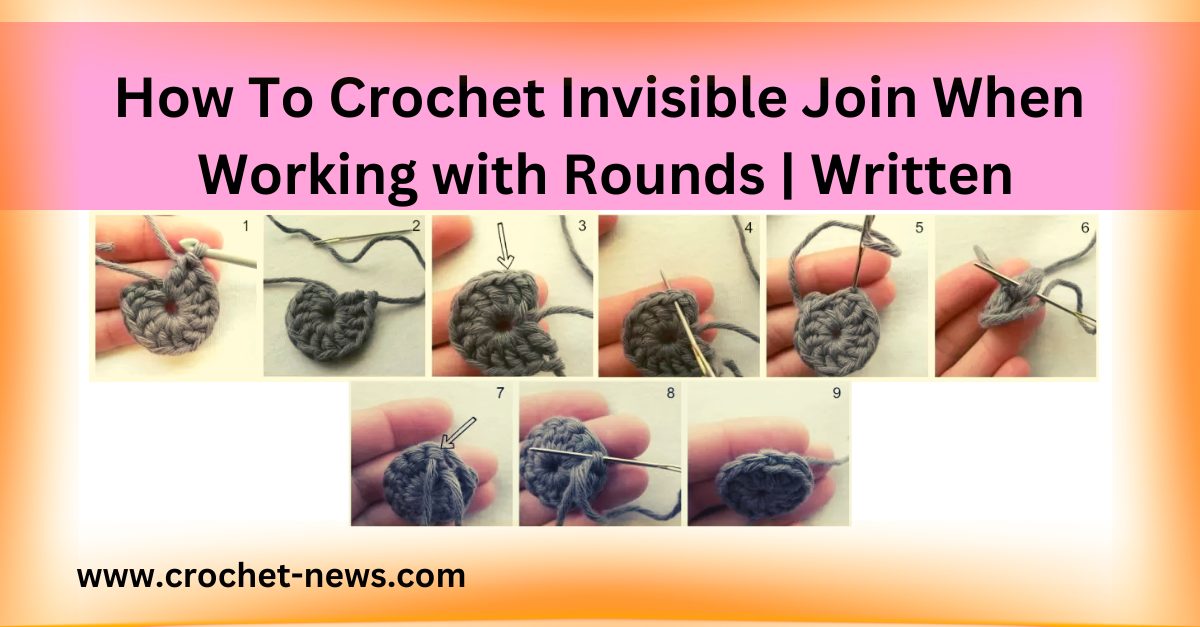
- Pick a circle pattern to do. Create the stitches needed in the first round.
Sample pattern: Using a magic circle, make 3 chain stitches (these will count as your first double crochets). Make 11 dc into the magic circle. Then, join to the upper part of the beginning chain stitches with an invisible join.
- Cut the yarn, leaving a tail for about 4 inches (10 cm).
- Pull the tail through the top of the last stitch you made.
- Get your tapestry needle and thread it to the yarn tail.
- Spot the first stitch and insert the needle under the top loops of the stitch.
- Pull the yarn tightly enough.
- Insert your needle directly into the hole at the top of the last stitch you made, passing through the horizontal loop behind the same stitch.
- To finally form a false stitch, pull the yarn not too tightly, to make it even with other stitches.
- Starting from top to bottom, insert the needle into the horizontal loop behind the stitch to render the invisible join secured.
- To end, remove the needle, pull the yarn, and cut it out.
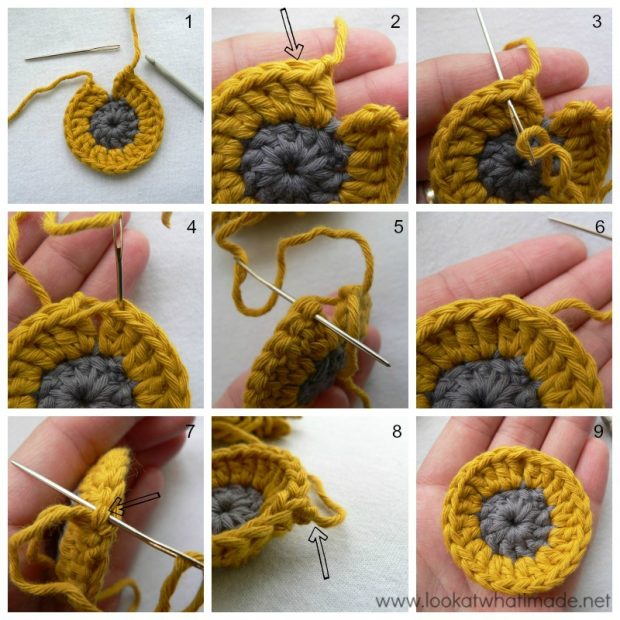
CROCHET INVISIBLE JOIN WITH A STANDING STITCH
- The steps in creating an invisible join in this new round is just the same as the first round.
- Start to create the first stitch, then proceed with the rest of the stitches as you normally would.
- Join the stitches using the invisible join.
- By replacing the first stitch with the “false one”, you will notice a tiny bumpy. Do not worry because it will not be visible anymore once the yarn tails are cut and the crochet is flattened out.
If you really want to compare the two, the next tutorials use the slip stitch to join stitches.
CROCHET TRADITIONAL SLIP STITCH JOIN WITH A STARTING CHAIN
- Create the stitches needed in this round.
Sample pattern: Using a magic circle, make 3 chain stitches (these will count as your first double crochets). Make 11 dc into the magic circle. Then, join to the upper part of the beginning chain stitches with an invisible join.
- Make a slip stitch to join the top of the beginning chain stitches.
- Since a slip stitch is made, an extra stitch is formed which is not counted as one of the stitches.
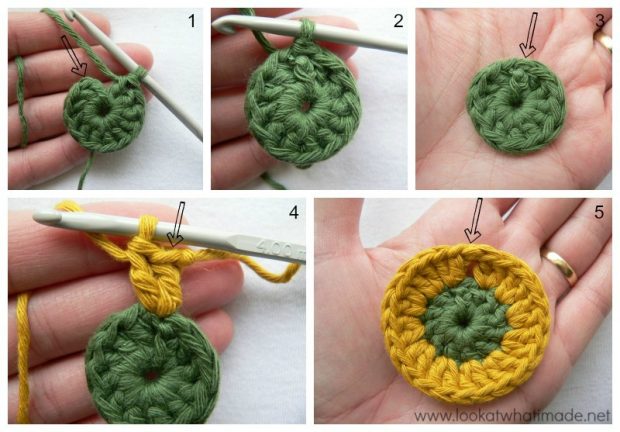
CROCHET TRADITIONAL SLIP STITCH JOIN WITH A STANDING STITCH
- From the first round, the slip stitch formed a tiny gap which it always does.
- With the same procedure, proceed to the stitches and join them using a slip stitch.
Now that both crochets are done, it is time to compare and learn the difference between the two.
In a slip stitch join, you can see and touch the join itself. While it forms annoying tiny bumps, the invisible crochet join makes the crochet neater and smoother.
Moreover, this crochet invisible join is perfect to use in stitching crochets that change colors.
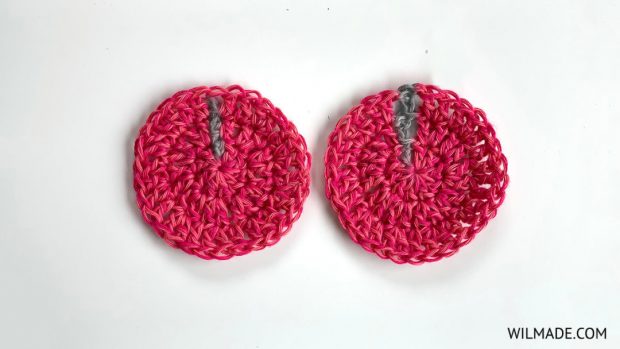
Now that you have learned the difference between the invisible crochet join and the traditional slip stitch join, you can always replace the slip stitch with the invisible seam in any pattern, as long as you know the structure of your stitches.
USEFUL ROUND CROCHET PATTERNS USING CROCHET INVISIBLE JOIN
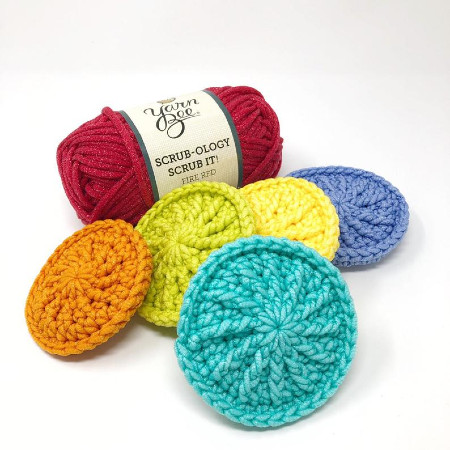
Here are some useful patterns you can try making for your home using the crochet invisible join:
Now you know how to crochet invisible join, you can create seamless look with your crochet projects!
Once you’ve successfully made your perfect round crochet using invisible crochet join, don’t forget to leave us a comment, a picture, or two at our Facebook page.
For more crochet tutorials, check out our tutorial on How to Make a Crochet Cord, and What is Crochet Blocking and How to do it.
We hope we’ve successfully swayed you into using Crochet Invisible Join When Working with Rounds. Happy seamless crocheting!

