Are you part of that crowd who feels as if your crochet projects are not yet finished unless you add border to it? You better check out the Reverse Single Crochet Stitch!
With this tutorial, you will be able to add the crochet crab stitch to your repertoire in a variety of ways. As an avid crochet fiend myself, I know you can never have too many different ways to edge your finished projects.
This stitch creates a dense border perfect for any pattern. In fact, you can even use it in round ones! Read on to learn the crochet crab stitch.
What is the Crochet Crab Stitch?
The Crab Stitch is also called the reverse single crochet stitch. The reason why becomes very obvious upon learning that the Crab Stitch if, in fact, created by single crochet stitches, in the reverse! (Like a crab that walks backwards, crochet puns, yay!)
Seriously though, the Crab Stitch is a wonderful option for edging. The result is a coiled, twisted edge that gives a nice, finished look to your project.
Be it blankets or hemlines on clothing. It also makes a great edging for necklines on tops as well as for handles on handbags. You can add it to just about any project for a solid, firm and funky edging.
It also gives a more polished finish to placemats and dishcloths.
It does feel a bit unnatural at first, but a little bit of practice and you’ll be comfortable with the process.
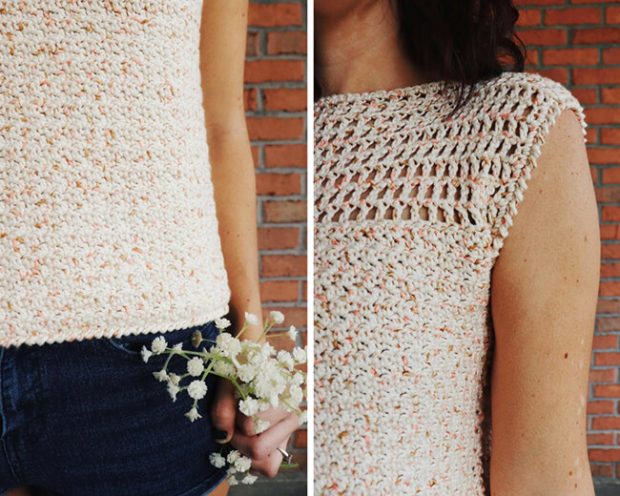
Well, there are other more artsy crochet stitches that can be used in adding borders to your works, but this stitch creates a dense edge that does not have any holes. If you want a more firm, cord-looking border for your works, this stitch is perfect!
What an easy way to add a border, texture, and also detail using just one stitch!
How to Crochet Crab Stitch
One of the first stitches you learn when you being to crochet is the single crochet stitch. We’re going to work that same stitch here, but backwards.
One thing that is a little different and worth mentioning is the right-handed versus left-handed aspect of working this stitch. Most of the time, crochet patterns don’t mention working right-or-left-handed. It is important here because of the reverse nature of the crab stitch.
I happen to be one of those lefties that has just learned on my own over the years how to crochet. Lefties work left to right with the hook in their left hand. Righties work right to left with the hook in their right hand.
So, for the crab stitch, those that are right-handed will be working left to right while those that are left-handed will be working right to left.
Also, this is always worked with RIGHT side facing you.
Right-Handed Instructions
To begin: complete the last row of your project, but DO NOT TURN. Insert hook into the first stitch on the left side of the work. Pull up a loop. Yarn over. Pull through BOTH loops on the hook. There you go, first crab stitch made! Continue on around the piece until you reach the end.
Left-Handed Instructions
To begin: complete the last row of your projects, but DO NOT TURN. Insert hook into the first stitch on the right side of the work. Pull up a loop. Yarn over. Pull through BOTH loops on the hook. There you go, first crab stitch made! Continue on around the piece until you reach the end.
Reverse Single Crochet Stitch Instructions
Once you have mastered the basic crochet stitches, learning this stitch will be awkward at first. It will most likely confuse you as it feels like you’re going against something.
The first two steps especially will be hard. But through practice, we’re pretty sure you’ll be able to perfectly make this stitch!
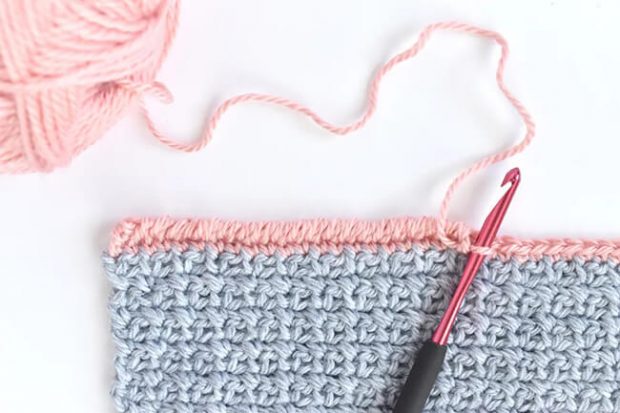
1. Start by inserting the hook
As opposed to single crochet stitch (sc), in reverse single crochet stitch (rsc), the hook is inserted to the right of the stitch after the previous stitch.
When you do this stitch, you don’t do a chain stitch for a turning chain.
You can already begin where you currently are. There is no need to turn or make a starting chain. BUT, if you find it hard to start the rsc, you can start with chain stitch.
Choosing to immediately do rsc or starting with a chain stitch first will not have a bad impact on your finished product.
2. Yarn over After inserting, yarn over like in sc.
This move might feel a bit awkward because you’re working in reverse. I suggest that you be mindful during the confusing times when you’re just starting to crochet rsc.
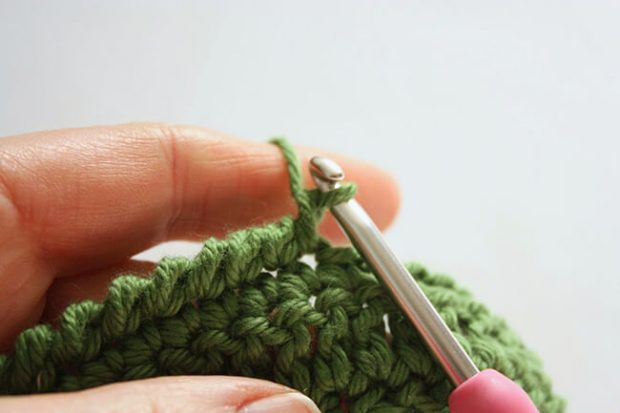
3. Draw the yarn into and out of the stitch.
By this time, there will be two loops on the hook. Draw the yarn through the stitch.
4. Yarn over for the second time.
5. Draw the yarn into and out of the stitch again.
After this, you have finally finished your first reverse single crochet stitch. Congratulations!
Patterns You Can Make Using the Reverse Single Crochet Stitch
Feel free to use this stitch in adding border to any project. It works well with dishcloths, blankets, scarves, and even clothes!
Finished with your crochet project but can’t figure out why it looks incomplete? Try adding borders around it using this stitch and watch it transform into a more finished look.
Give your blankets firmer edges by adding borders using this stitch. It will not only give the blanket a more secured edge, but it will also add more intricate details to it.
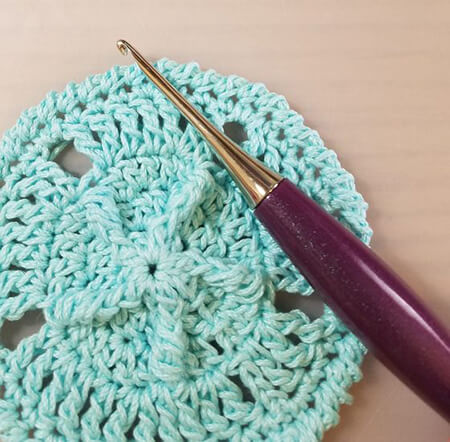
Aside from rectangular projects, you can also use this stitch in circular ones like table runners, and even coasters! Use the same color as your work to add subtle change in texture.
Otherwise, if you want the border to be more visible, use a contrasting color to make it pop! A simple design that can definitely add a lot of impact to your work.
Now You Know The Reverse Single Crochet Stitch
Have you worked on crochet projects that used the Reverse Single Crochet Stitch AKA Crab Stitch Crochet? We’d love to see them! Share your works on our Facebook Page so we can cheer you on!
Are you looking for other stitches to learn? We have plenty of other crochet stitch tutorials you can try!
We hope you had fun learning a new stitch through this Reverse Single Crochet Stitch Tutorial, and we’re looking forward to seeing more of your works on our page!


